Lip contouring is a makeup technique that makes your lips look fuller. It uses liner, lipstick, and highlighter to create natural definition. You can shape your lips and fix uneven areas with simple steps. This guide shows you how to contour lips that look real, not fake. Learn the easy way to get beautiful, balanced lips today.
Why Lip Contouring Matters More Than Ever
Do your lips look flat or uneven in photos? You're not alone in feeling this way. The secret to perfectly shaped lips isn't just good genes. It's a makeup trick called lip contouring.
This technique has changed a lot over the years. Gone are the harsh dark lines from the 1990s. Today's lip contouring looks natural and subtle. It makes your lips look better without looking fake.
You don't need expensive lip fillers or treatments. Simple makeup can give you fuller, more balanced lips. The best part is that anyone can learn this skill. With practice, you'll create lips that look amazing in person and photos.
Understanding the Basics of Lip Contouring
Lip contouring uses light and dark shades to shape your lips. Think of it like creating shadows and highlights. Dark colors make areas look smaller or deeper. Light colors make areas look bigger or fuller.
The technique is similar to contouring your face. But lips need a gentler touch and more precision. When done right, people notice your beautiful lips. They won't know exactly what makes them look so good.
Our eyes see depth through light and shadow. Lip contouring uses this natural trick. It creates the illusion of fuller, more defined lips. No needles or procedures required.
Essential Tools and Products You'll Need
You need the right products to contour your lips successfully. A good lip liner is your most important tool. Choose one that's slightly darker than your natural lip color.
The liner should be creamy enough to blend easily. But it also needs to hold its shape all day. Avoid liners that are too waxy or too dry.
You'll also need two lipstick shades for your look. Pick your main color that you want overall. Then choose a lighter shade for highlighting the center.
A small brush helps you work on detailed areas. A lip brush gives you more control than the lipstick tube. Clear gloss adds extra shine and dimension. Concealer cleans up edges and perfects your lip line.
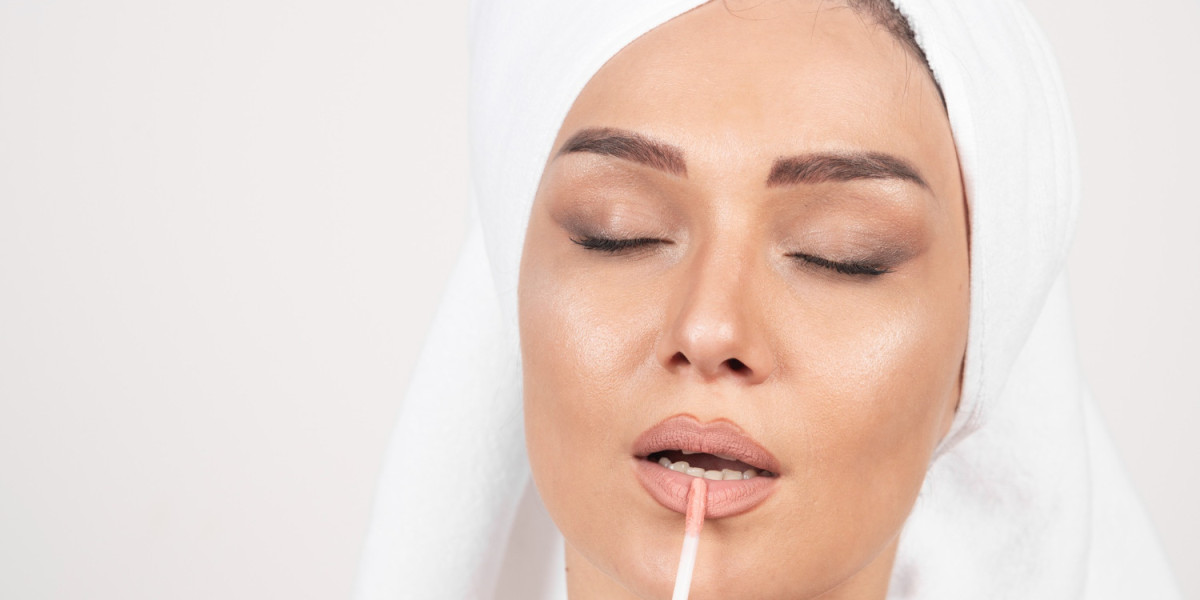
Step-by-Step Lip Contouring Technique
Start with clean, smooth lips for the best results. Dry or flaky lips will make your makeup look uneven. Apply lip balm and let it sink in completely. Then blot away any extra product.
Look at your lips closely in the mirror. Notice where they're fuller and where they're thinner. Everyone's lips are slightly different on each side. That's completely normal and natural.
Find your cupid's bow at the top center. This is the M-shaped curve on your upper lip. This area will be important for your contouring.
Use your lip liner starting at the cupid's bow peak. Make small, short strokes instead of one long line. This gives you better control and looks more natural.
Follow your natural lip line very closely. Only go one millimeter beyond your actual lip edge. Going further makes it look obvious and fake.
For the bottom lip, start at the center. Work your way out toward the corners on both sides. Keep the liner on or just inside your natural line.
Fill in your lips with your main lipstick color. Cover everything evenly from edge to edge. Don't worry if it's not perfect yet.
Now apply your lighter shade to the center of both lips. This creates the illusion of fullness where you want it. Blend the edges so there's no harsh line.
Use concealer around your lips to clean up the edges. This step makes your work look professional and polished. The sharp, clean line makes your lips pop.
Add a tiny dot of gloss to your bottom lip center. This catches light and makes lips look even fuller.
Common Mistakes to Avoid
Many people overline their lips way too much. Going beyond two millimeters looks obvious and fake. Natural lighting makes this mistake very noticeable.
Using a lip liner that's too dark is another problem. It creates that outdated ring around your lips. Your liner should only be slightly darker than your lipstick.
Forgetting to blend is a huge mistake. Harsh lines between colors ruin the natural effect. Always blend edges with a brush or your fingertip.
Skipping lip prep makes your makeup look bad. Always start with smooth, hydrated lips. This makes products go on evenly and last longer.
Customizing Techniques for Different Lip Shapes
Thin lips need special attention for the best results. Overline the center more than the corners. Use lighter shades generously in the middle area. Avoid very dark colors that make thin lips look smaller.
If your lips are uneven, use liner to balance them. Adjust the line slightly on the smaller side. Most people won't notice small differences anyway. Aim for improvement, not perfection.
Full lips need definition more than extra volume. Focus on creating a clean, precise outline. Use darker shades more and lighter highlights less. This enhances your natural shape beautifully.
Quick Tips for Perfect Lip Contouring
Here are some helpful tips to improve your results:
Practice your technique at home when you're not rushed
Take photos in different lighting to check your work
Use a mirror with good natural light for application
Start with subtle contouring and build up slowly
Invest in good quality lip products that blend easily
Keep a cotton swab handy to fix small mistakes
Set your lips lightly with powder for longer wear
Blot between layers to make your lipstick last longer
Choose nude or neutral liners for everyday looks
Keep your lip brush clean for the best application
Making Your Lip Contour Last All Day
Longevity matters for any makeup technique you use. Start with lips that are hydrated but not greasy. Layer your products in the right order for best results.
Apply liner first, then fill with your main lipstick color. Blot gently with a tissue to remove excess product. Apply a second thin layer of lipstick over the first.
Add your highlights and gloss as the final step. This layering method helps lock in all the color. Your contoured lips will last for hours without touch-ups.
Conclusion: Embrace Your Perfect Pout
Lip contouring is an easy skill anyone can learn. You don't need expensive treatments to get beautiful lips. Just practice these simple techniques with the right products.
Remember that the goal is to enhance your natural features. You're not trying to completely transform your face. Small improvements make a big difference in your confidence.
Start practicing when you have time to experiment freely. Take pictures to see how your contouring looks. With regular practice, this will become quick and easy. Your perfectly contoured lips are just a few tries away.